Garrattfan's Modelrailroading Pages
AD60
4.1 Boiler cradle assembly
|
Instructions [215] to [229], page 22 of the rewritten instruction manual |
|
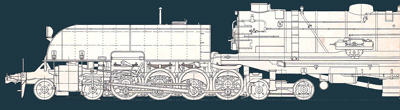
After finishing both drive units the boiler cradle was the only major structural component to be assembled. A friend was already joking that from now "I was stuck in the middle" Constructionally the boiler cradle is less critical than any of the drive units. Its just a mighty heap of work. And fun! |
|
 [215] First thing to do was to remove the mainframes and footplates from their etches and debur them. This photo is taken for fun: I filed and sanded the footplate sufficiently square to let it stand on edge!! |
|
 |
I carefully stroked the mainframe over the edge of my desktop to eliminate the bend in the material. Do not be tempted to do this in two or three strokes. Easy does the job, you'll get the feel for it. |
Matching the footplate and the mainframes. [217] I had to devise a way to solder the footplate and the mainframe straight and square together, holding both awkward parts in place without meeting the business end of the soldering iron.... I pondered on the problem for a while and I came up with idea of using two wooden strips as a guide. It proved to be very helpful. It has one setback: it burns. So you have to work quickly and cool the soldered joint with an wetted cotton swab. The footplate has six tabs. I soldered them with 240C solder in this order (numbered 1 to 6 from left to right): 1, 4, 6 , 3, 2, 5 I chose this particular order to dissipate the heat as much as possible and keep the strain in the assembly as low as possible. Do not linger with the soldering iron as the brass will expand and the assembly will not be straight after cooling down. |
|
Square and straight. |
[218] Once the tabs had been spot soldered I checked if the assembly was straight and square. After this check I replaced it between the wood strips and ran a fillet of 180C solder along the entire length of the frame to fill out the seam. Again don't linger with the soldering iron. I turned down the heat of the iron
After that I again checked for squareness and straightness. |
 |
There is an opening in the upper part of the mainframe where the firebox will come. During soldering this part was proved to have a mind of its own. It expanded so rapidly that I could not solder it before the frame bent. So I again clamped the whole frame with thin side between two strips of wood, fluxed it well and gave it a very quick pass with the iron. That worked wonderfully. |
 |
[216] Finally I added the firebox support plates (61). The white strip is water logged kitchen tissue paper to cool the seam between mainframe and footplate.
A close reader may have noticed that I changed the working order of the instructions. The manual instructs you to add the firebox support plate (instr. 216) before joining the mainframe and the footplate (instr. 217). This would introduce the risk of the firebox support coming off again while soldering mainframe and footplate making things more complicated as they were. So I decided to add the firebox support plate later. |
 After soldering the assemblies were thoroughly cleaned from any superfluous solder. |
|
 |
[219] The main footplate is deburred on a sanding stick. Carefully straighten the footplate. It is a long part and the white metal is very soft so it is bound to be warped in every of the three dimensions. |
 Once straightened it can be offered up to the mainframe assies. Simple laundry pegs have been adapted to serve as temporary clamps. |
|
 |
Check and check again for squareness. First solder the tab that fits in the locating lugs at the bottom side of the white metal footplate, just visible in front of the square, on the photo above tab no 3 from the left. Then solder tabs 2, 5, 1, 6, 4. Again check for squareness and once satisfied run a fillet of solder along the entire seam, rinse thoroughly, dry it and clean the seam. |
|
|
 Time to show off the result! |
|
 |
[220] Now attention turns to the boiler. It is the bulkiest casting of all but calls for surprisingly little rework. There is a seam on the top the boiler which must be removed with great care. An excellent casting, a benchmark. Every dent or carve you make here is one too much as it will be very visible. It is not difficult, just work carefully not taking away too much material at one time and just go easy on it. Sand the bottom of the boiler. See to it that the boiler is located easily on the spigots and still in the middle of the footplate. Also sand smokebox supports on the eft and right side until the boiler fits between the cradle's mainframes. Sand both the smokebox front edge and the firebox rear edge dead flat before soldering. Trial fit the smokebox door and the spectacle plate to check if they fit and sit well.
|
 |
I found only one real casting error on the boiler, on the left hand side of the boiler. I sanded, filled... |
 |
...and sanded again after the filler had set |
 |
I sprayed a thin base coat on it. A base coat always reveals every flaw in the work you have done. Since most of the firebox underside disappears between the frameplates this repair isn't too critical. |
 |
|
Now work on the boiler starts. Fit it between the vertical frameplates of the cradle. It may take some fiddling before it fits. Remove all casting marks ever so carefully as any dent will show up nastily Solder the boiler on the inside, two points on the smokebox and two in the firebox. No need to solder all the way along the seams as these are hidden by the cradle frames.
|
|
[222] tells you almost casually "Add the spectacle plate". Here's a big pitfall. It does not even take a close look at the spectacle plate to see that is is loaded with dimples, indicating the location where holes must be drilled. If you do not drill these to correctly sized holes before fixing the spectacle plate to the boiler you're in trouble. It will be very hard to drill these holes in a later stage. So do it now!
Looking up which holes to drill to what size takes a lot of reading and studying in the manual. The good news is: I have that for you!! The diagram below shows all you need to know. The dimple on the far right hand end of the seven dimples behind the turret is left untouched. A control bar, estimated 0.4 mm, runs from part number 75 the regulator fitting (see diagram #2) to the cab. It touches the spectacle plate somewhere between the port hole and the front window at the right side. A new hole was drilled there |
|
 |
|
Part 17: the steam turret. What the heck is a steam
The steam turret with its backside forward, to show the corresponding holes turret? The steam turret is located on the top rear of the boiler. The turret contains
That means a lot of piping runs from the turret to the various mentioned appliances. It also means that control bars run into the cab where the actual control are located to operate valves in the turret and also some steam pipes. These latter bars and pipes are not mentioned in any way in the manual, yet if you take a close look at diagram #3A and #3B you'll see that they are drawn between the turret and the spectacle plate. As control bars are usually thinner I chose to drill holes of 0.3 mm only. Of course I drilled the corresponding five holes in the back of the turret. (see photo). While you are at it drill the two holes at the turret's outer end as well (1.0 mm) to receive the injector pipes. |
|
 |
When drilling please appreciate that the spectacle plate is tilted forward by a few degrees. Drill the holes accordingly so you won't have to add another bend in the pipes before feeding them into the spectacle plate. You have enough trouble with the piping already!!
I made myself a little help. With a carpenter's square I measured how much the spectacle plate tilts forward. I found myself a piece of aluminium (any material would do) of a fitting thickness, glued it on a piece of plywood and located the spectacle plate so that it would tilt almost the same as on the boiler. If you then drill vertically, your holes will have the right angle!! |
| 0.3 mm holes tend to be on the tight side as white metal is relatively soft and sags back into the old shape. So clear the hole by passing a cleaned drill through a few times and then trial fit a piece of 0.3 mm. It would be a shame of all the hard work if you found the hole is too narrow after you fitted the spectacle plate to the assembly. | |
View of the front side note that the left and right are turned around, the right cab side is the left of the locomotive |
Note that there are dimples in the outer ends of the cab sides. These should be drilled before fitting the sides. Front side (left photo) A 0.7 mm pipe is received in the lowest hole of both cab sides. I drilled them accordingly. All other holes were drilled 0.5 mm. |
 View of the rear side. Left is left and right is right. Right? |
The right cab side is drilled once with 0.7 mm to take up an electrical conduit. The subdiagram in the left upper corner of diagram #2 says 1.0mm, way too big. The left cab side is drilled with 0.8 mm in the top two holes to accommodate handrail knobs. |
At long last the spectacle plate can be joined with the firebox [221] |
|
The driver's cab completed. Note that the cab roof is not permanently fixed. You will need the access to the cab in a later stage. |
|
| The main structure of the boiler cradle is now ready so we can turn to detailing it. | |


Sign my
GuestBook